Lethal's Rack Build Out Part 1

Lethal.Coffee's Server Rack

Lethal's Current WIP Rack (Stage 2, Cleaned Up)
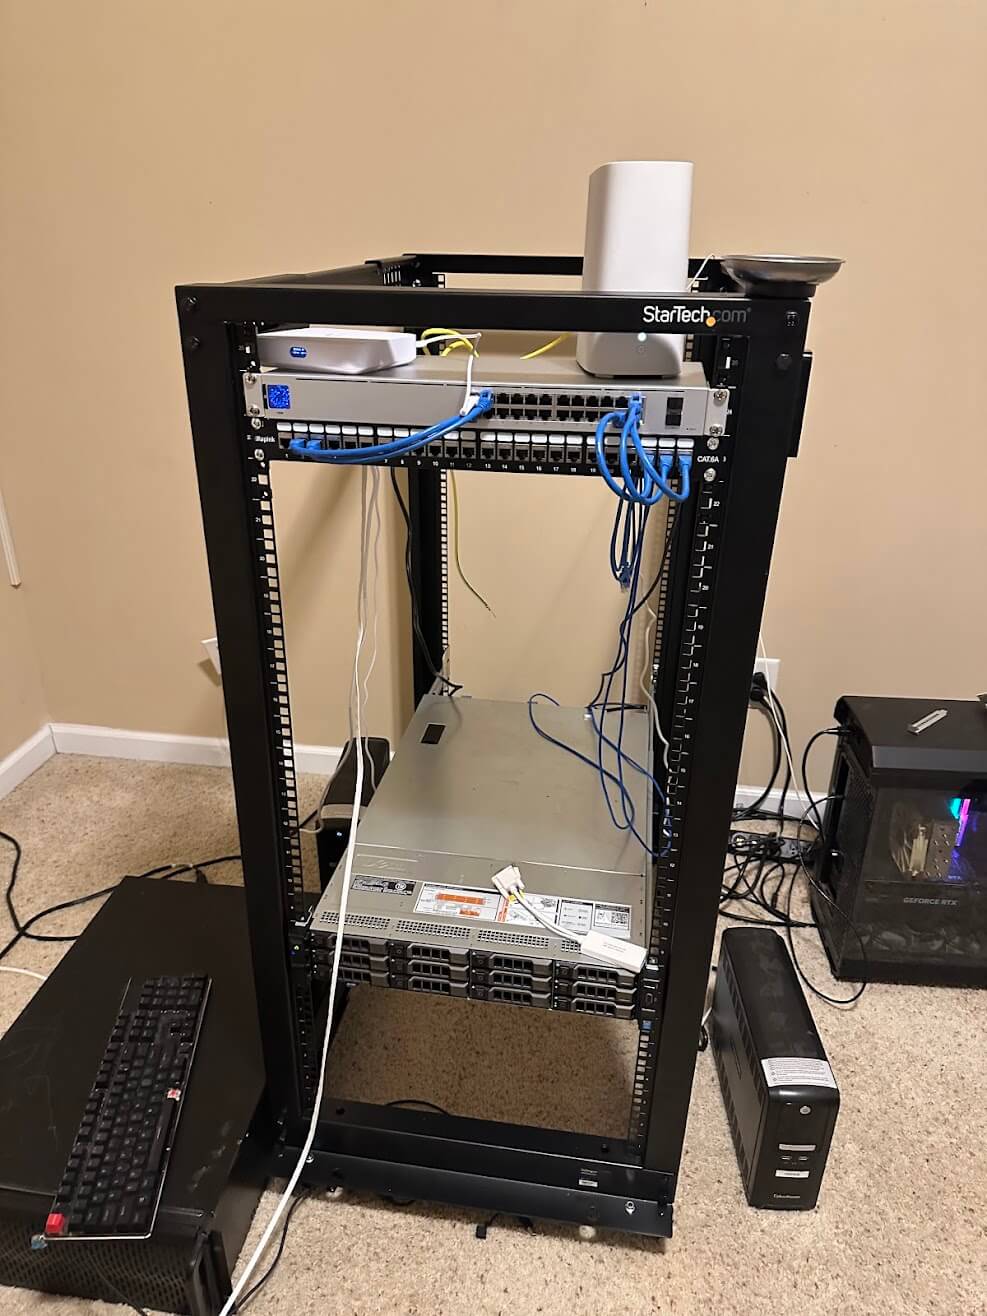
Lethal's Rack Originally (Before any cleanup, second server)
The Start of the Build
As some of you from our community are well aware, and others that are joining us now are learning, I, myself, have a huge passion for technology, gaming and story telling. This means I have a lot of technology and need places to store everything. As a result I got a server rack from Amazon and slowly started to build it up and out. As time went on it became more and more unruly cable and aesthetics wise. The original setup wasn't great looking and over time we slowly added new things to it and evolved the layout and the feel of the rack.
My rack originally looked like the image pictured to the right, was horrible, messy, and looked very unusable. As I planned to host more in that rack than a couple Ethernet connections and a single NAS running TrueNAS Scale, I had to come up with a plan to clean up and organize the rack more so that it looks much cleaner.
Step 1: Acquire Cable Management Hardware
This might sound a bit silly to most, but yes, cable management hardware exists. Some did come with the rack when I bought it in the form of cable arms, however, those aren't very useful for truly cleaning up the cabling of the rack and making it so that it'll continue to breathe well long term and also not become a rats nest of cabling.
To solve this issue I enlisted the help of Velcro cable ties, which should never be under estimated in their usefulness and also the re-usability vs zip ties. You can find them very cheap on Amazon and I truly do recommend that you don't skimp on them as you'll find yourself needing more and more over time!
The next thing I bought to assist with was several cable management accessories (see actual hardware) from LTTStore (list below). I know, what you might be thinking in relation to it being a YouTuber's merch, and honestly, I was in that same boat till I caved and bought it. Since it was delivered and I have used it, I can safely say it has helped me a lot and enabled things that I never thought possible to be done this easily to be quickly, and easily done.
To accomplish this you can use the following to copy what I did. Please note the exact amount you need will vary by your setup and needs. I have 10x of the 1ft Cat6A cables and 5x the Cat6A cables for example. Luckily the links for them down below are in a multi-pack. I also cannot stress enough the niceness and ease of use for using a patch panel. I recommend using the keystone type rather than a punch down so you can move the cables around and replace easier. If you buy a patch panel that allows you to swap keystones you can even use multiple types of keystones (fiber, RJ45, etc) rather than being limited to what the patch panel had originally as well.
Part List:
- LTT MCM Arches (X-L 1pack, x3)
- LTT MCM Cable Tie Holder (4-pack)
- Velcro Wire Ties (100pack)
- Cat6A 1ft cable (switch to patch panel)
- Cat6A 3ft cable (switch to patch panel, longer)
- Cat6A 5ft cable (Patch Panel to servers)
- Cat6A 7ft cable (Not currently used, but allows longer reach in the rack)
Step 2: Come up with a Cable Routing Plan
This step is very often overlooked and under appreciated. Not making a plan and figuring out how you want to organize your cables will result in you having to re-manage cables in the future. It can also result in you having a rats nest unintentionally or simply a not as clean setup. When I was planning the cables out I started out by grouping cables that are going one direction and using the Velcro wire ties to organize them in the general area I had them planned for. After this I would take a step back and figure out how the cables would run.
Typically I'd try to keep cables in smaller groups to make managing them easier, then you can combine the larger groups that are going the same way with a larger strip of Velcro down the road. At this time, however, I've not had enough cables to justify the combined Velcro to accomplish this. I would recommend, however, that once the larger Velcro Bundle is complete you consider either moving where you have your existing, Velcro ties or simply removing them. This keeps to a more consistent look and overall will be more appealing to the eyes.